チュートリアル:ラジオボタンとチェックボックス
ラジオボタンとチェックボックスを使用して、アプリケーションに選択可能なオプションを追加します。
レベル: 初級
プラットフォーム: Windows, macOS, Linux, iOS, Android
クラス: ToggleButton, Button, Label, String
はじめに
このチュートリアルのデモプロジェクトをこちらからダウンロードしてください:PIP | ZIP。プロジェクトを解凍し、最初のヘッダファイルを Projucer で開いてください。
この手順でサポートが必要な場合は、チュートリアル:Projucer Part 1: Projucer を始めようを参照してください。
デモプロジェクト
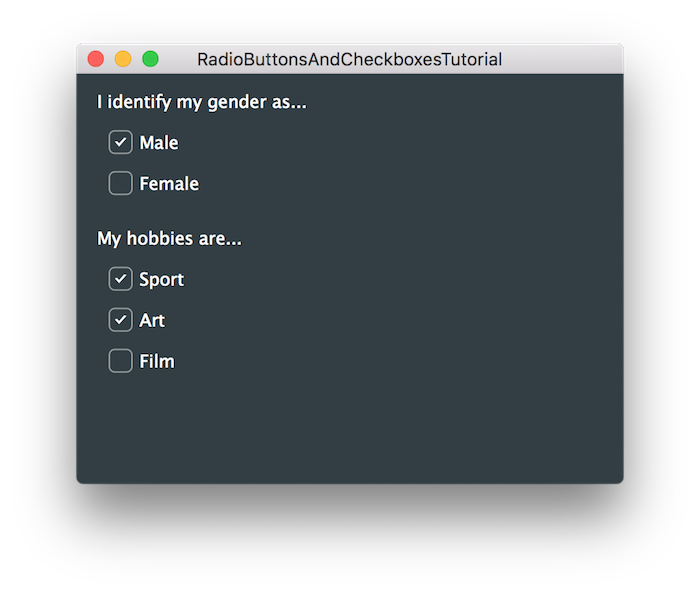
デモプロジェクトは、JUCE でのラジオボタンとチェックボックスの使用を示しています。これらは通常ToggleButtonクラスを使用して実装されますが、任意の JUCE Buttonコンポーネントを個々のトグルボタンとして、または「ラジオグループ」の一部として使用できます。デモアプリケーションは、いくつかの見出し(Labelクラスを使用)と一連のToggleButtonコンポーネントを表示します:

ラジオボタンとチェックボックス
このチュートリアルでは、オン/オフスタイルのオプションを作成するためのButtonクラスの使用を調べます。通常、これにはToggleButtonクラスを使用しますが、上述のように、任意のボタンをトグルタイプのボタンとして設定できます。標準のToggleButtonコンポーネントは、テキストとテキストの左側にチェックマークを含むか含まない「バブル」で構成されています。(この外観は、必要に応じてLookAndFeelクラスを使用してカスタマイズできます。)これらの 2 つの状態は、前のセクションのスクリーンショットで見ることができます。
MainContentComponentコンストラクタでは、「male」と「female」ボタンは以下のように設定されます:
addAndMakeVisible (maleButton);
addAndMakeVisible (femaleButton);
maleButton.onClick = [this] { updateToggleState (&maleButton, "Male"); };
femaleButton.onClick = [this] { updateToggleState (&femaleButton, "Female"); };
ここでは、ToggleButtonオブジェクトがTextButtonオブジェクトと同じ方法で設定されていることがわかります(チュートリアル:リスナーとブロードキャスターを参照)。これらの 2 つのトグルボタンを相互排他的にするには、同じ「ラジオグループ」に追加する必要があります。これにより、これらのボタンのうち 1 つだけが一度にオンにできるようになります(他のボタンをオンにすると、もう一方がオフになります)。ラジオグループ IDは、相互排他的でなければならないボタンのグループを識別するために使用される非ゼロの整数です。さらに、これが機能するためには、同じラジオグループ IDを持つすべてのボタンが同じ親コンポーネントの子コンポーネントである必要があります。(ボタンが異なる親コンポーネントまたは異なるウィンドウ内にある場合は、この相互排他的な動作を自分で実装する必要があります。)
この例では、列挙値(GenderButtons)をラジオグループ IDとして使用します:
enum RadioButtonIds {
    GenderButtons = 1001
};
次に、Button::setRadioGroupId()関数を使用してラジオグループ IDを設定します。
maleButton.setRadioGroupId (GenderButtons);
femaleButton.setRadioGroupId (GenderButtons);
setRadioGroupId()関数は、ToggleButtonクラスだけでなく、Buttonクラスのメンバーであることに注意してください。任意のボタンをラジオグループの一部にできますが、そのボタンが(単にクリックイベントをインターセプトするだけでなく)オンとオフを切り替えられることを期待するように設定されている場合にのみ意味があります。
他の 3 つのToggleButtonオブジェクトは、ラジオグループに追加せずに設定されます:
addAndMakeVisible (sportButton);
addAndMakeVisible (artButton);
addAndMakeVisible (filmButton);
sportButton.onClick = [this] { updateToggleState (&sportButton, "Sport"); };
artButton.onClick = [this] { updateToggleState (&artButton, "Art"); };
filmButton.onClick = [this] { updateToggleState (&filmButton, "Film"); };
Buttonオブジェクトは、ゼロ引数でButton::setRadioGroupId()関数を呼び出すことで、ラジオグループから削除できます。
トグル状態の変更への応答
オンまたはオフにトグルできるボタンへの応答は、通常のボタンクリックへの応答と似ています。ボタンがトグルされたときに呼び出す関数を、Button::onClickヘルパーオブジェクトにラムダ関数を割り当てることで指定する必要があります(上記のコードスニペットで見られるように)。
違いは、updateToggleState()関数でボタンのトグル状態もチェックする必要があることです。これを行うには、Button::getToggleState()関数を呼び出すことができます。これもButtonクラスのメンバーなので、任意のボタンに対して有効です(ただし、ボタンがオンとオフを切り替えられることを期待している場合にのみ意味があります。そうでない場合はfalseを返します)。
void updateToggleState (juce::Button* button, juce::String name)
{
    auto state = button->getToggleState();
私たちの例では、トグルの変更をロガーに投稿するだけです:
juce::String stateString = state ? "ON" : "OFF";

juce::Logger::outputDebugString (name + " Button changed to " + stateString);
}
特に、「Male」または「Female」ボタンのいずれかをオンにトグルすると、他のボタンが「オフ」に切り替わり、かつこれがupdateToggleState()関数によって報告されることに注意してください。
追加のToggleButtonオブジェクトを追加してください。もちろん、趣味をもっと簡単に追加できます。ただし、性別カテゴリの下にもオプションを追加できます。例えば、「回答しない」や「その他」などです。
他のボタンをトグルとして使用
上記で示唆されているように、任意のボタンをトグルボタンとして使用できます。説明するために、デモプロジェクトのすべてのToggleButtonオブジェクトをTextButtonオブジェクトに変換しましょう。ここで行う必要がある明らかなことは、メンバー変数のタイプをTextButtonクラスに変更することです:
juce::Label genderLabel { {}, "I identify my gender as..." };
juce::ToggleButton maleButton { "Male" },
    femaleButton { "Female" };

juce::Label hobbiesLabel { {}, "My hobbies are..." };
juce::ToggleButton sportButton { "Sport" },
    artButton { "Art" },
    filmButton { "Film" };

//==============================================================================
JUCE_DECLARE_NON_COPYABLE_WITH_LEAK_DETECTOR (MainContentComponent)
};
ただし、マウスクリックでボタンをトグル可能にするには、Button::setClickingTogglesState()関数を呼び出す必要があります。これを行うには、MainContentComponentコンストラクタ内の任意の場所に以下のコードを追加します:
maleButton.setClickingTogglesState (true);
femaleButton.setClickingTogglesState (true);
sportButton.setClickingTogglesState (true);
artButton.setClickingTogglesState (true);
filmButton.setClickingTogglesState (true);
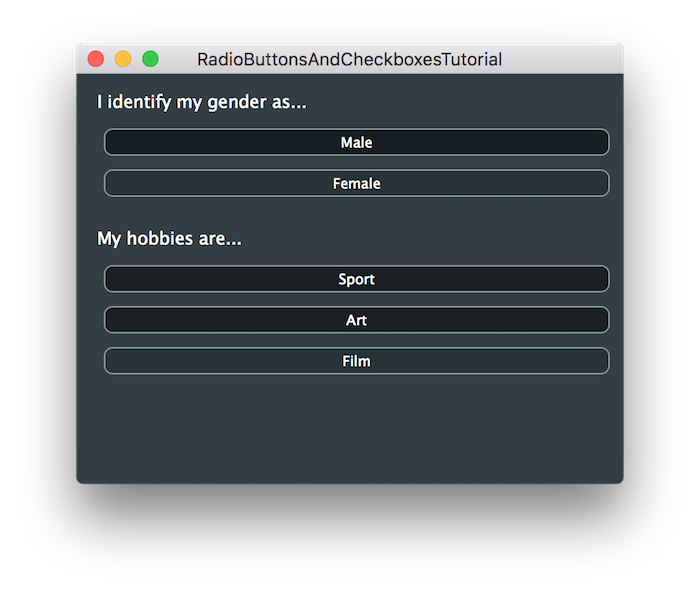
このコードを実行すると、元のアプリケーションと同じように使用できますが、外観が異なるものになります:

オン状態とオフ状態でのテキストボタンの色のカスタマイズについては、チュートリアル:JUCE での色を参照してください。
テキストを使用してボタンのトグル状態を表示
ボタンのトグル状態に応じて表示されるテキストを変更したい場合もあるでしょう。これを行うには、updateToggleState()関数内でButton::setButtonText()関数を呼び出すだけです。これを試すには、updateToggleState()関数を以下のように修正します:
void updateToggleState (juce::Button* button, juce::String name)
{
    auto state = button->getToggleState();
    juce::String stateString = state ? "ON" : "OFF";
    juce::String selectedString = state ? " (selected)" : "";

    juce::Logger::outputDebugString (name + " Button changed to " + stateString);
    button->setButtonText (name + selectedString);
}
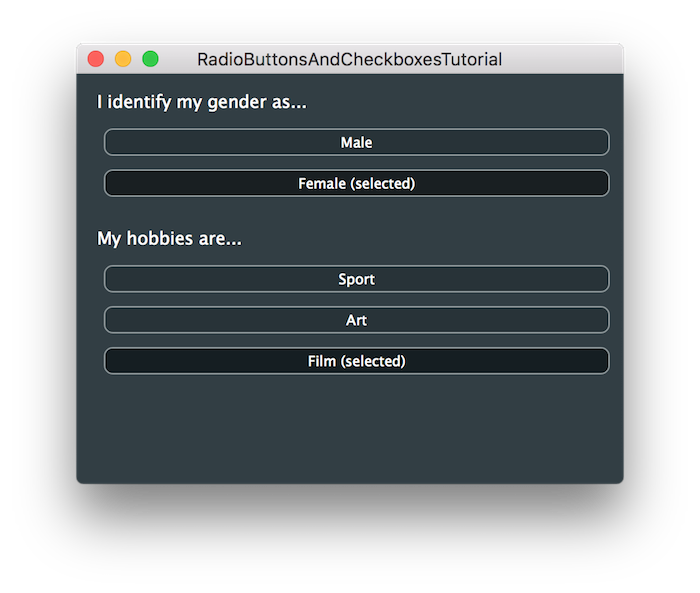
この場合、ボタンがオンの状態にある場合、通常のボタンテキストに「(selected)」というテキストを追加するだけです。
この技術は、ここに示されているTextButtonコンポーネントとToggleButtonコンポーネントの両方で機能します。
これでアプリケーションは以下のスクリーンショットのようになります:

まとめ
このチュートリアルでは、チェックボックスとラジオボタンスタイルのコントロールの使用を紹介しました。特に、独自のアプリケーションで以下のことができるようになるはずです:
- ToggleButtonオブジェクトを使用し、状態の変更に応答する。
- ToggleButtonオブジェクトのテキストを状態に応じて変更する。
- ToggleButtonオブジェクトをグループ化して、グループ内の 1 つのボタンのみが一度にオンにできる「ラジオグループ」を形成する。
- 他のButtonコンポーネントをトグルとして使用する。