チュートリアル:JUCE での色
アプリケーション内でさまざまな方法で色を指定し適用します。
レベル: 初級
プラットフォーム: Windows, macOS, Linux, iOS, Android
クラス: Colour, Colours, LookAndFeel
はじめに
このチュートリアルのデモプロジェクトをこちらからダウンロードしてください:PIP | ZIP。プロジェクトを解凍し、最初のヘッダファイルを Projucer で開いてください。
この手順でサポートが必要な場合は、チュートリアル:Projucer Part 1: Projucer を始めようを参照してください。
デモプロジェクト
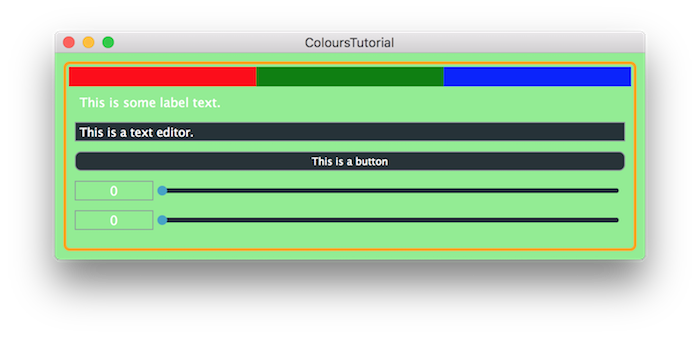
デモプロジェクトはいくつかの子コンポーネントを表示し、JUCE でコンポーネントに色を指定して適用する方法を示すシンプルな描画コマンドを実行します。アプリケーションは以下のスクリーンショットと同様に見えるはずです:

このチュートリアルの最初の部分では、より一般的な色の指定方法を見ていきます。これはデモアプリケーションのpaint()関数内の描画コードを変更することで説明されます。チュートリアルの 2 番目の部分では、組み込みコンポーネントタイプ(ラベル、スライダーなど)の要素に色を指定する方法を示します。
色と一般的な描画操作
JUCE は赤、緑、青、アルファ(透明度)の値を使用して色を指定します。これはもちろん、コンピューティングで広く使用されている色を指定する方法ですが、すべての実装は若干異なります。特に、JUCE は色を操作するための便利なメソッドを提供しており、アプリケーションの一貫したカラーパレットを維持するのに役立ちます。まず、デモアプリケーションのpaint()関数を見てみましょう:
void paint (juce::Graphics& g) override
{
    g.fillAll (juce::Colours::lightgreen);
    g.setColour (juce::Colours::orange);

    auto centralArea = getLocalBounds().toFloat().reduced (10.0f);
    g.drawRoundedRectangle (centralArea, 5.0f, 3.0f);

    juce::Array<juce::Colour> colours { juce::Colours::red, juce::Colours::green, juce::Colours::blue };

    auto colourBarArea = centralArea.reduced (4.0f).withHeight (20.0f);
    auto colourArea = colourBarArea.withWidth (colourBarArea.getWidth() / (float) colours.size());

    for (auto colour : colours)
    {
        g.setColour (colour);
        g.fillRect (colourArea);

        colourArea.translate (colourArea.getWidth(), 0.0f);
    }
}
最初の行はグラフィックスコンテキスト全体を単一の色で塗りつぶします(これはコンポーネントの境界全体を意味します):
g.fillAll (juce::Colours::lightgreen);
次の行は、指定されたグラフィックスコンテキストで今後の描画操作の色を設定します。
g.setColour (juce::Colours::orange);
次に、わずかにインセットした矩形を定義し、現在の色を使用して角丸矩形をボーダーとして描画します:
auto centralArea = getLocalBounds().toFloat().reduced (10.0f);
g.drawRoundedRectangle (centralArea, 5.0f, 3.0f);
次に、異なる色の矩形の行を描画するために使用する色の配列を設定します。
juce::Array<juce::Colour> colours { juce::Colours::red, juce::Colours::green, juce::Colours::blue };
この色付き矩形の行を描画するために、まずそれらが配置される領域を定義します:
auto colourBarArea = centralArea.reduced (4.0f).withHeight (20.0f);
次に、最初の色付き矩形の領域を定義します。これはcolourBarArea矩形の合計幅を使用する色の数で割った比率になります:
auto colourArea = colourBarArea.withWidth (colourBarArea.getWidth() / colours.size());
最後に、色の配列を反復処理し、指定された色で矩形を塗りつぶし、次の反復のためにcolourArea矩形を右に移動します:
for (auto colour : colours)
{
    g.setColour (colour);
    g.fillRect (colourArea);

    colourArea.translate (colourArea.getWidth(), 0.0f);
}
次のいくつかの例では、colours配列に追加する色を変更することで、色を指定するいくつかの方法を示します。
名前による色の指定
デモプロジェクトと上記のコードに示されているように、Colours名前空間のいくつかの定数を使用して JUCE で色を指定できます。
利用可能な色の完全なリストについては、Colours名前空間の API ドキュメントを参照してください。これらはほとんど標準的な HTML 色です。
Colours名前空間内の定数に加えて、Colours::findColourForName()関数を使用して、文字列を使用して目的の色名を検索できます。例えば、以下のコードを使用してcolours配列を同じ赤、緑、青の色で埋めることができます:
auto defaultColour = Colours::black;

juce::Array<juce::Colour> colours { juce::Colours::findColourForName ("red", defaultColour),
    juce::Colours::findColourForName ("green", defaultColour),
    juce::Colours::findColourForName ("blue", defaultColour) };
名前付きの色の検索が失敗した場合に備えて、デフォルトの色を提供する必要があります(この場合は単に黒を使用)。
Colours::findColourForName()関数は大文字と小文字を区別せずに検索し、文字列の先頭と末尾の空白を削除しますが、文字列内のスペースは削除しません。例えば、色は内部的にすべて小文字の文字列を使用して保存されていますが、以下のコードは期待通りに動作します:
auto defaultColour = juce::Colours::black;

juce::Array<juce::Colour> colours { juce::Colours::findColourForName ("DarkRed", defaultColour),
    juce::Colours::findColourForName ("DarkGreen", defaultColour),
    juce::Colours::findColourForName ("DarkBlue", defaultColour) };
これにより以下の色が生成されます:

しかし、色名内にスペースを含めると失敗し、各ケースで黒い色が返されます:
auto defaultColour = Colours::black;

juce::Array<juce::Colour> colours { juce::Colours::findColourForName ("Dark Red", defaultColour),
    juce::Colours::findColourForName ("Dark Green", defaultColour),
    juce::Colours::findColourForName ("Dark Blue", defaultColour) };
これらのインスタンスで必要に応じて独自の関数を書くのは簡単です。例えば、文字列からすべてのスペースを削除する関数を書くことができます:
static juce::String removeSpaces (const juce::String& text)
{
    return text.removeCharacters (" ");
}
そしてColours::findColourForName()関数に文字列を渡すときにそれを使用します:
auto defaultColour = juce::Colours::black;

juce::Array<juce::Colour> colours { juce::Colours::findColourForName (removeSpaces ("Dark Red"), defaultColour),
    juce::Colours::findColourForName (removeSpaces ("Dark Green"), defaultColour),
    juce::Colours::findColourForName (removeSpaces ("Dark Blue"), defaultColour) };
値による色の指定
Coloursは、生の赤、緑、青、アルファ値を使用して指定することもできます。ここでは、0.0〜1.0 の範囲の浮動小数点値、または 0〜255 の整数(uint8 型)を使用してColourオブジェクトを作成できます。整数を使用すると、同じ赤、緑、青の色を次のように作成できます:
juce::Array<juce::Colour> colours { juce::Colour (255, 0, 0), // red
    juce::Colour (0, 128, 0), // green
    juce::Colour (0, 0, 255) }; // blue
標準の「green」色は、色の緑要素に最大値 255 を持っていません。
この場合、アルファ値を省略するとアルファ値は最大(255)に設定され、色は完全に不透明になります。
単一の 16 進数値を使用して色を指定することもできます。この場合、色値要素の順序は:アルファ、赤、緑、青です:
juce::Array<juce::Colour> colours { juce::Colour (0xffff0000), // red
    juce::Colour (0xff008000), // green
    juce::Colour (0xff0000ff) }; // blue
この場合、アルファ値を指定しないとゼロに設定される(したがって透明になる)ため、必ずアルファ値を指定する必要があります。
Colour::fromFloatRGBA()関数を使用して浮動小数点値も使用できます:
juce::Array<juce::Colour> colours { juce::Colour::fromFloatRGBA (1.0f, 0.0f, 0.0f, 1.0f), // red
    juce::Colour::fromFloatRGBA (0.0f, 0.5f, 0.0f, 1.0f), // green
    juce::Colour::fromFloatRGBA (0.0f, 0.0f, 1.0f, 1.0f) }; // blue
整数値 128 は約 0.501961 の浮動小数点値に相当します。したがって、緑の色は前の例と完全に同じではありませんが、0.5 はこのデモには十分近いです。
異なる色値を試して、アプリケーションを実行して結果を確認してください。colours配列に追加する色は 3 つに限定されず、任意の数(1 以上)の色を使用できます。
色相、彩度、明度
Colourオブジェクトは、色相、彩度、明度の値から初期化することもできます。これは、いくつかの知覚的特性を共有する異なる色を生成する 1 つの方法です。
例えば、以下のコードを使用して、明るい赤と暗い赤のシリーズを作成できます:
juce::Array<juce::Colour> colours { juce::Colour::fromHSV (0.0f, // hue
                                        0.5f, // saturation
                                        0.3f, // brightness
                                        1.0f), // alpha
    juce::Colour::fromHSV (0.0f, 0.5f, 0.5f, 1.0f),
    juce::Colour::fromHSV (0.0f, 0.5f, 0.7f, 1.0f) };
ここでは、各色の色相、彩度、アルファ値は一定です(0.0f の色相は「赤」として認識される色を生成するはずです)。結果は以下のスクリーンショットに示されています:

Colourオブジェクトから色相、彩度、明度の値を取得することもできます。例えば、異なる明度の紫のシリーズが必要な場合は、以下のコードを使用できます:
auto purpleHue = juce::Colours::purple.getHue();

juce::Array<juce::Colour> colours { juce::Colour::fromHSV (purpleHue, 0.5f, 0.3f, 1.0f),
    juce::Colour::fromHSV (purpleHue, 0.5f, 0.5f, 1.0f),
    juce::Colour::fromHSV (purpleHue, 0.5f, 0.7f, 1.0f) };
この結果は以下のスクリーンショットに示されています:

色値の操作
既存の色を使用して新しい色を作成することもできます。例えば、既存の色よりも若干明るいまたは暗い色を作成するには、それぞれColour::brighter()またはColour::darker()関数を使用できます:
auto baseColour = juce::Colours::orange;

juce::Array<juce::Colour> colours { baseColour.darker(),
    baseColour,
    baseColour.brighter() };
または、Colour::interpolatedWith()関数を使用して 2 つの色をブレンドできます:
auto colour1 = juce::Colours::red;
auto colour2 = juce::Colours::purple;

juce::Array<juce::Colour> colours { colour1,
    colour1.interpolatedWith (colour2, 0.5f),
    colour2 };
この結果は以下のスクリーンショットに示されています:

ある色に対して、別の色に対して明確に見える色を作成するには、Colour::contrasting()関数を使用できます。これにより、引数を使用してコントラストの量を指定できます:
auto baseColour = juce::Colours::darkcyan;

juce::Array<juce::Colour> colours { baseColour,
    baseColour.contrasting (0.5f) };
2 つの他の色に対してコントラストのある色を作成することもできます:
auto colour1 = juce::Colours::lightblue;
auto colour2 = juce::Colours::darkred;

juce::Array<juce::Colour> colours { colour1,
    juce::Colour::contrasting (colour1, colour2),
    colour2 };
Colour::overlaidWith()関数を使用して、重ねられた色のアルファチャネルを考慮して 2 つの色をブレンドするなど、他にもさまざまな操作を実行できます。
コンポーネントの色の指定
前のセクションでは、コンポーネントのpaint()関数で独自の描画操作を実行するときの色の使用を探りました。組み込みコンポーネント(スライダー、ラベルなど)の色をカスタマイズするには、Component::setColour()またはLookAndFeel::setColour()関数を使用する必要があります。
基本的に、各組み込みComponentサブクラスには、特定の色を持つことができるコンポーネントのさまざまな要素をリストするenumが含まれています。これらの各項目はカラー IDと呼ばれます。(これらのカラー ID の値は JUCE ライブラリ全体で一意です。)例えば、Labelクラスのカラー ID は以下のとおりです(Label::ColourIdsから):
- Label::backgroundColourId:ラベルを塗りつぶす背景色。
- Label::textColourId:テキストの色。
- Label::outlineColourId:ラベルの周りにボーダーを描画するためのオプションの色。アウトラインを持たない場合は透明のままにします。
- Label::backgroundWhenEditingColourId:ラベルが編集されているときの背景色。
- Label::textWhenEditingColourId:ラベルが編集されているときのテキストの色。
- Label::outlineWhenEditingColourId:ラベルが編集されているときのオプションのボーダー色。
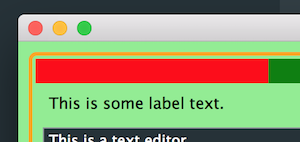
これらの色のいくつかを変更してみましょう。MainContentComponentコンストラクタを見ると、Label、TextEditor、TextButton、および 2 つのSliderオブジェクトが子コンポーネントとして追加されています。ラベルのテキスト色を黒に変更するために、以下のように行[1]を追加します:
MainContentComponent()
{
    label.setColour (juce::Label::textColourId, Colours::black); // [1]
    label.setEditable (true);
    addAndMakeVisible (label);
    //...
結果は以下のスクリーンショットと同様になるはずです:

TextEditor、TextButton、Sliderクラスのカラー ID(TextEditor::ColourIds、TextButton::ColourIds、Slider::ColourIds)を確認し、デモアプリケーションの子コンポーネントに異なる色を設定して実験してください。
ルック&フィールの色の設定
アプリケーション、またはアプリケーションの一部で、同じタイプのすべてのコンポーネントに同じカラーパレットが必要なことは非常に一般的です。前のセクションの演習で、両方のスライダーに同じ外観を与えるために Component::setColour()関数の呼び出しを繰り返す必要があることに気づいたかもしれません。LookAndFeelクラスの 1 つの使用法は、これらの色を指定する単一のポイントを提供することです。これを説明するために、MainContentComponentコンストラクタを以下のように元の状態に戻します:
MainContentComponent()
{
    label.setEditable (true);
    addAndMakeVisible (label);

    textEditor.setText ("This is a text editor.");
    addAndMakeVisible (textEditor);

    textButton.setClickingTogglesState (true);
    addAndMakeVisible (textButton);

    addAndMakeVisible (slider1);
    addAndMakeVisible (slider2);

    setSize (600, 210);
}
次に、両方のスライダーのサムの色を設定するために以下の行[2]を追加します:
//...
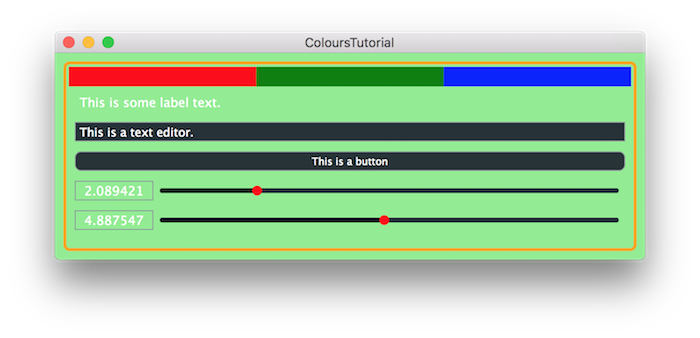
getLookAndFeel().setColour (juce::Slider::thumbColourId, juce::Colours::red); // [2]
addAndMakeVisible (slider1);
addAndMakeVisible (slider2);
//...
これにより、以下のスクリーンショットと同様の結果が得られるはずです:

カスタムルック&フィールの色
LookAndFeelクラス(LookAndFeel_V1、LookAndFeel_V2、LookAndFeel_V3、またはLookAndFeel_V4)のサブクラスを作成し、コンストラクタで特定の色をカスタマイズすることもできます。これを行うには、MainContentComponentクラスのネストされたクラスとして以下のクラスを追加できます:
class CustomLookAndFeel : public juce::LookAndFeel_V4
{
public:
    CustomLookAndFeel()
    {
        setColour (juce::Slider::thumbColourId, juce::Colours::red);
    }
};
このクラスのインスタンスを private メンバーセクションに追加します[3]:
private:
    CustomLookAndFeel lf; // [3]
    juce::Label label { {}, "This is some label text." };
そして MainContentComponent クラスにこのルック&フィールを使用するようにコンストラクタで設定します[4]:
MainContentComponent()
{
    setLookAndFeel (&lf); // [4]

    label.setEditable (true);
このサブセクションの変更されたコードは、デモプロジェクトのColoursTutorial_02.hファイルにあります。
CustomLookAndFeelコンストラクタでより多くの色をカスタマイズしてください。
まとめ
このチュートリアルでは、独自のアプリケーションで使用できる以下の項目を見てきました:
- ColourクラスとColours名前空間を使用して JUCE で色を指定する方法。
- 描画操作を実行するときにコンポーネントの
paint()関数で色を使用する。 - カラー ID を使用して組み込みコンポーネントの要素の色を指定する。
- LookAndFeelクラスを使用してアプリケーションの一部またはアプリケーション全体で色を指定する。