チュートリアル:Graphics クラス
このチュートリアルでは、Graphicsオブジェクトを使用してテキスト、線、幾何学的形状を描画する方法を示します。これは JUCE で描画を行うための基本です。
レベル: 初級
プラットフォーム: Windows, macOS, Linux, iOS, Android
クラス: Component, Graphics, Font, Colours, Path
はじめに
このチュートリアルのデモプロジェクトをこちらからダウンロードしてください:PIP | ZIP
デモプロジェクト
このチュートリアルのデモプロジェクトには、メインアプリケーションウィンドウとメインコンポーネントが含まれています。これらについては前回のチュートリアルチュートリアル:アプリケーションウィンドウとチュートリアル:メインコンポーネントで馴染みがあるはずです。
メインコンポーネント(または実際には他の Component!)の外観は、そのpaint()関数の実装によって決定されることはすでにご存知でしょう。ここでのデモプロジェクトは、前回のチュートリアル(チュートリアル:メインコンポーネント)が終了した場所から始まります。paint()関数の実装は最初は以下のようになっています:
void paint (juce::Graphics& g)
{
    g.fillAll (juce::Colours::lightblue);

    g.setColour (juce::Colours::darkblue);
    g.setFont (14.0f);
    g.drawText ("Hello, World!", getLocalBounds(), juce::Justification::centred, true);
}
今アプリをコンパイルして実行すると、ウィンドウが水色の背景色になり、その上に**Hello, World!**というテキストがウィンドウの中央に描画されているのが見えるはずです。
以下では、Graphicsクラスを使用してMainComponentオブジェクトにさらにグラフィックスを描画するコードを追加します。これは非常に強力なクラスで、将来のチュートリアルで異なる JUCE コンポーネントのカスタムビジュアル外観を実装するために頻繁に使用します。
Graphics クラス
paint 関数をもう一度見てみましょう。paint()関数は、オペレーティングシステムがComponentを画面にレンダリングする時間になったときに呼び出されるコールバックであることを覚えておいてください --- この関数を自分で呼び出すべきではありません。
このコールバックの引数として、Graphicsインスタンスへの参照が渡されることに注意してください。このGraphicsオブジェクトは、基盤となるフレームワークによって提供されます。これは、テキスト、線、形状、色、グラデーションなど、あらゆるグラフィカル要素をレンダリングするために使用できるグラフィックスコンテキストです。このチュートリアルではこれらのいくつかを探ります。
Graphicsクラスは通常、paint()コールバック内でのみ使用されます。通常、画像への描画を除いて、他の場所では使用すべきではありません。
テキストのレンダリング
フォントの設定
まずテキストから続けましょう。以下の行
g.setFont (20.0f);
は、後続の行(そのフォントを使用して**Hello, World!**というテキストを描画する)のフォントサイズを 20 ピクセルに設定します。しかし、フォントのサイズだけでなく、別の書体や太字やイタリック文字を使用したい場合はどうでしょうか?そしてテキストの位置を変更するにはどうすればよいでしょうか?
実際には、サイズを決定するfloatだけでなく、Fontオブジェクトを取るGraphics::setFont()関数の別のバージョンがあります。新しいFontオブジェクトは次のように作成できます:
juce::Font mainComponentFont ("Times New Roman", 20.0f, juce::Font::italic);
このフォントをメインコンポーネントに使用するので、説明的な変数名mainComponentFontを選びます。
Fontコンストラクタの最初の引数は書体を決定し、2 番目はフォントサイズ、3 番目はフォントスタイルです。ここではスタイルにイタリックを選びました。フォントスタイルは実際にはビットマスクとして使用できるフラグです(チュートリアル:アプリケーションウィンドウを参照)。そのため、例えば次のように組み合わせることができます:
juce::Font mainComponentFont ("Times New Roman", 20.0f, juce::Font::bold | juce::Font::italic);
アプリを再度コンパイルして実行すると、フォントが変更されているのが見えるはずです。
コンピュータに実際にインストールされていない書体をフォントに使用することは、JUCE アプリでフォントが正しく動作しない非常によくある理由です。
名前付きのFontオブジェクトを作成してから次の行でGraphics::setFont()関数で設定する代わりに、両方を 1 つのステートメントで行うこともできます:
g.setFont (juce::Font ("Times New Roman", 20.0f, juce::Font::italic));
ただし、ステートメントを分離して名前付き変数を使用すると、コードの可読性と保守性が向上します。(現代のコンパイラでは、このような追加の変数を導入してもパフォーマンスに影響はありません。)
位置の設定
次にテキストの位置を変更します。この過程で、JUCE での位置指定がどのように処理されるかを学びます。
簡単な方法は、コンポーネント全体に対するテキストの配置を変更することです。例えば、Justification::centred値を他の可能な値の 1 つ、例えばJustification::topLeft値に変更することです。(他の可能なJustification::Flags値も確認できます。)しかし、別の非常に強力なアプローチは、サイズと位置を明示的に定義することです。このアプローチを使用するGraphics::drawText()関数の別のバージョンがあります。g.drawText()呼び出しで始まる行を以下に変更します:
g.drawText ("Hello, World!", 20, 40, 200, 40, juce::Justification::centred, true);
これはGraphicsオブジェクトに、幅 200 ピクセル、高さ 40 ピクセルの領域にテキストをレンダリングし、メインコンポーネントの左上隅から右に 20 ピクセル、下に 40 ピクセルの位置に配置するよう指示します。
アプリは次のようになるはずです:

覚えておいてください:JUCE での座標は常に現在のコンポーネントの左上隅から測定され、それが点(0, 0)です。座標はintまたはfloat数値として与えることができます。グラフィカル要素または子コンポーネントの位置を指定するために使用される場合、その左上隅が指定された位置に表示されるように配置されます。
最後に、Graphics::drawText()関数の最後の引数は、テキストが指定された幅に収まらない場合に省略記号(...)を表示するか、テキストを単に切り捨てるかを決定するboolフラグです。
演習:テキストフィールドの幅を 200 からより小さい値に変更し、省略記号フラグがどのように機能するか注意してください。
Graphics::drawText()関数は単一行テキストのレンダリングに適しています。複数行テキストには、Graphics::drawMultiLineText()やGraphics::drawFittedText()などの他の関数があります。
幾何学的形状のレンダリング
このセクションでは、Graphicsクラスを使用していくつかの幾何学的形状を描画していきます。
線の描画
paint()関数の末尾に以下の行を追加します:
g.setColour (juce::Colours::green);
g.drawLine (10, 300, 590, 300, 5);
これは(10, 300)から始まり(590, 300)で終わる、幅 5 ピクセルの緑色の水平線をウィンドウに描画します。最後に使用した色とは別の色で幾何学的形状を描画するたびに、描画する前にGraphics::setColour()関数を呼び出す必要があることに注意してください。
もちろん、他の座標を指定して対角線を描くこともできます。実際、JUCE はサブピクセル座標もサポートしています(位置にfloat値を使用できます)。位置が物理的な画面ピクセルの間に落ちる場合、JUCE は描画にアンチエイリアスを適用します。
演習:他のタイプの線を探ってみてください。破線や矢印を描画する方法がわかりますか?ヒント:Graphicsクラスのドキュメントを見てください。
矩形の描画
Graphicsオブジェクトを使用した矩形の描画は非常に簡単です。paint()関数本体に以下の行を追加します:
g.setColour (juce::Colours::sandybrown);
g.drawRect (300, 120, 200, 170);
これは茶色の矩形をレンダリングし、幅 200 ピクセル、高さ 170 ピクセルで、左上隅が位置(300, 120)に配置されます。
オプションの 5 番目の引数で線の太さを指定できます:
g.setColour (juce::Colours::sandybrown);
g.drawRect (300, 120, 200, 170, 3);
塗りつぶされた矩形が必要な場合は、代わりにGraphics::fillRect()関数を使用します:
g.setColour (juce::Colours::sandybrown);
g.fillRect (300, 120, 200, 170);
位置、幅、高さを別々に与える代わりに、矩形を表すより便利なクラスRectangleクラスがあります。このようなRectangleインスタンスを取って矩形の位置を指定するGraphics::drawRect()関数のバージョンもあります:
juce::Rectangle<int> house (300, 120, 200, 170);
g.setColour (juce::Colours::sandybrown);
g.fillRect (house);
この非常に便利なRectangleクラスは将来のチュートリアルで探ります。
演習:角丸矩形を描画する方法を調べてください。次に、塗りつぶされた角丸矩形を描画してみてください。
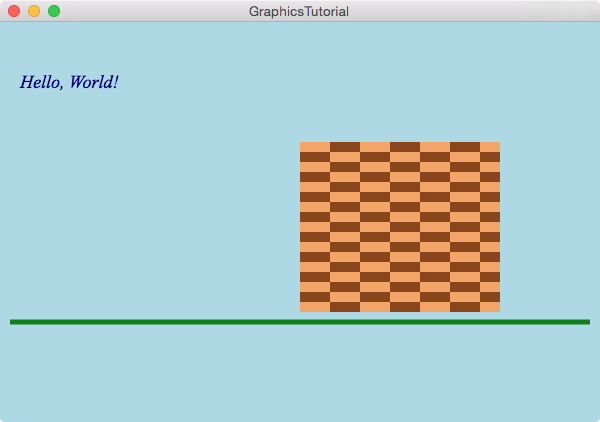
矩形を単色で塗りつぶす必要はありません。カラーグラデーションや他のいくつかのパターンも使用できます。茶色の矩形が家を表しているとしましょう。チェッカーボードパターンで塗りつぶすことで、レンガのようなテクスチャを追加できます。矩形を描画するには以下のコードを使用します:
juce::Rectangle<float> house (300, 120, 200, 170);
g.fillCheckerBoard (house, 30, 10, juce::Colours::sandybrown, juce::Colours::saddlebrown);
今アプリケーションをコンパイルして実行すると、次のようになるはずです:

円の描画
Graphicsクラスが円と楕円をどのように描画するか見てみましょう。Graphics::drawEllipse()とGraphics::fillEllipse()関数を見てください。これらはGraphics::drawRect()とGraphics::fillRect()関数と同じように機能します。
小さな風景に太陽を追加しましょう。以下のコードは、ウィンドウの右上領域に直径 60 ピクセルの円を描画します:
g.setColour (juce::Colours::yellow);
g.drawEllipse (530, 10, 60, 60, 3);
与えられた位置(530, 10)は円の中心をその位置に配置するわけではないことに注意してください。代わりに、他のすべてのグラフィカル要素と同様に、オブジェクトはその囲む矩形の左上隅が指定された位置に配置されるように配置されます。
コンポーネントの境界を明示的に使用して位置を計算することもできます。例えば:
g.setColour (juce::Colours::yellow);
g.drawEllipse (getWidth() - 70, 10, 60, 60, 3);
演習:円をより便利に描画するためのGraphics::drawEllipse()関数のラッパー関数を書いてください。関数は点の座標と半径を取り、その点を中心として与えられた半径の円を描画する必要があります。
他の多角形の描画
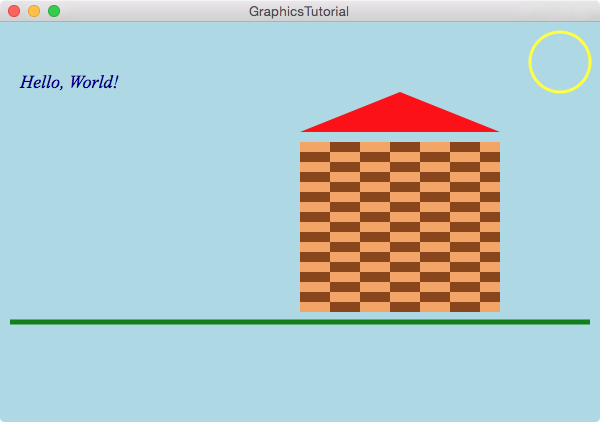
最後に、家に屋根を追加しましょう。これは赤い三角形になります。
GraphicsクラスにはdrawTriangle()やdrawPolygon()という関数がないことがわかります。このためには、より汎用的なアプローチを取る必要があります。
Pathクラスを確認してください。これは基本的に接続された点の任意のセットを処理します。この場合、3 つの点で構成される三角形が必要です。例えば、屋根の三角形が家の矩形の上に載るように、3 つの点(300, 110)、(500, 110)、(400, 70)を使用できます。
JUCE コードでの赤い屋根は次のようになります:
g.setColour (juce::Colours::red);

Path roof;
roof.addTriangle (300, 110, 500, 110, 400, 70);
g.fillPath (roof);
今コンパイルして実行すると、完成したデモアプリは次のようになるはずです:

Pathクラスは他にも多くのことができ、将来のチュートリアルでより深く探ります。
まとめ
このチュートリアルでは、Componentクラスのpaint()コールバック内でGraphicsオブジェクトを使用してコンポーネント内に描画する方法を示しました。今では以下に慣れているはずです:
- テキストのレンダリングとフォーマット。
- 線の描画。
- 矩形、円、多角形などの幾何学的形状の描画。
また、Graphicsオブジェクトは基盤となるフレームワークによって提供される描画コンテキストであり、paint()コールバックの外では使用すべきではないことも知っているはずです。
注記
Graphicsクラスは、このチュートリアルで説明した以上のグラフィカルレンダリング機能を持っています。特に、画像ファイルからの画像を画面に描画するために使用できます。Pathクラスを使用してできることも他にたくさんあります。Graphicsクラスの他の機能には、カラーグラデーション、透明度レイヤー、変換などがあります。これらのいくつかは将来のチュートリアルでカバーされます。